React example app with TypeScript and SCSS using create-react-app
JointJS+ is a standard JavaScript library that you can use in any JavaScript framework. In this tutorial, we will show how you can use JointJS+ in your React apps. The tutorial will go over the typical process of creating a React app, setting up the build process, and integrating JointJS+ components into your React app. The resulting very simple demo app will display the JointJS+'s Paper and PaperScroller components, and render a rectangle element to that paper area. Similarly, you can add any other JointJS+ UI components and build up a fully-featured diagramming application. Let's go!
The source code for the following tutorial can be found here. Looking for a different version of your favourite framework? Be sure to checkout the different branches of the repository to see if you find what you need.
Prerequisites
-
JointJS+ package which includes the following files (located in "build/package" directory):
"index.ts", "package.json", "joint-plus.js", "joint-plus.css", "joint-plus.d.ts"
Create a React project using create-react-app
Let's create a new project from the terminal. Simply run:
npx create-react-app react-rappid --template typescriptAfter a couple of seconds, a new React project should be created.
In this tutorial, we will be adding SCSS support, but this next step is entirely optional, and not required for the application to function successfully. Everything in the tutorial will work just fine with native CSS. To add SCSS support, change into your newly created project directory, and add SCSS support:
cd react-rappid
npm install sass@1.66.1
The next step is the same if you have added SCSS support or not, run the app from the root folder with the following command:
npm startThe app should be ready and running at http://localhost:3000/
Add JointJS+ to the React project
Firstly, we need to add JointJS+ to our dependencies. For this tutorial, we will place our installable "joint-plus.tgz" package in the root directory of our React app. After that is completed, we can now update our existing dependencies in our package.json file with the following:
"dependencies": {
    ...
    "@joint/plus": "file:joint-plus.tgz", // path to file
    ...
},
Then, run npm install.
Next, open the "tsconfig.json" file in the root project directory, and set "skipLibCheck" to "true" in the "compilerOptions" as there is no need for the TS compiler to check the JointJS+ library:
"compilerOptions": {
    ...
    "skipLibCheck": true,
    ...
},
Build your app
Before we start, let's clean up our project a little bit:
-
If using SCSS, rename "App.css" to "App.scss"
-
Remove all code inside App.scss / App.css
-
Open "App.tsx" and:
-
Remove everything inside the "return" method
-
Remove the logo asset "import"
-
If using SCSS, change the styles import from "./App.css" to "./App.scss"
-
After completing those steps, your "App.tsx" should look like the following:
import React from 'react';
import './App.scss'; // import './App.css'; - if using native CSS

function App() {
    return ();
}

export default App;
Now, let's add our canvas container. Inside the "return" method, add an empty "div" with a className of "canvas", and a ref attribute with a value of "canvas". Ref is the React way to access DOM elements in the render method. More information on ref can be found here: Refs and the DOM
Our "return" method should now look like this:
return (
    <div className="canvas" ref={canvas}/>
);
Now, let's create our ref using the "useRef" hook. Add an additional import in the first line:
import React, { useRef } from 'react';Next, on the first line of the "App" function, add this:
const canvas: any = useRef(null);More information about the "useRef" hook can be found here: useRef
It's time to add some basic styling. Place the code below inside the "App.scss" file.
@import "~@joint/plus/joint-plus.css";

#root {
    height: 100vh;
    width: 100vw;

    .canvas {
        width: 100%;
        height: 100%;

        .joint-paper {
            border: 1px solid #A0A0A0;
        }
    }
}
If using CSS, "App.css" should look like the following:
@import "~@joint/plus/joint-plus.css";

#root {
    height: 100vh;
    width: 100vw;
}

.canvas {
    width: 100%;
    height: 100%;
}

.joint-paper {
    border: 1px solid #A0A0A0;
}
Notice the import of the JointJS+ stylesheet at the top of the section. The prefix "~" at the start of the path instructs the Webpack loader to resolve the import from a node module path.
In our "App.tsx" file, we will take advantage of the "useEffect" hook to handle side effects in our component.
Add "useEffect" to the imports alongside the JointJS+ library - we will use that later. Imports should now look like this:
import React, { useEffect, useRef } from 'react';
import { dia, ui, shapes } from '@joint/plus';
import './App.scss'; // import './App.css'; - if using native CSS
Create the "useEffect" hook with an empty dependency array. This will act similarly to the "componentDidMount" method. More information can be found here: useEffect
Your current "App" function should look like the following:
function App() {
    const canvas = useRef(null);

    useEffect(() => {

    }, []);

    return (
        <div className="canvas" ref={canvas}/>
    );
}
Now, it's time to create our JointJS+ components.
Inside the "useEffect" hook add Graph, Paper, and PaperScroller like this:
const graph = new dia.Graph();

const paper = new dia.Paper({
    model: graph,
    background: {
        color: '#F8F9FA',
    },
    frozen: true,
    async: true,
    sorting: dia.Paper.sorting.APPROX,
    cellViewNamespace: shapes
});

const scroller = new ui.PaperScroller({
    paper,
    autoResizePaper: true,
    cursor: 'grab'
});
Resources:
Next, let's render our PaperScroller component using our paper ref. First, we need to append the PaperScroller HTML element to our canvas HTML container.
Inside the "useEffect" hook add:
canvas.current.appendChild(scroller.el);
scroller.render().center();
On the last line, we are calling the "render" method on our PaperScroller. Additionally, we also call the "center" method to position the Paper inside the PaperScroller.
Some of the last steps are to create a simple rectangle shape, add it to our graph, and unfreeze the Paper.
Finally, we want to perform a little clean up, so we don't introduce a memory leak. That means we return a function from our effect which removes our paper. Add this block of code to the "useEffect" hook:
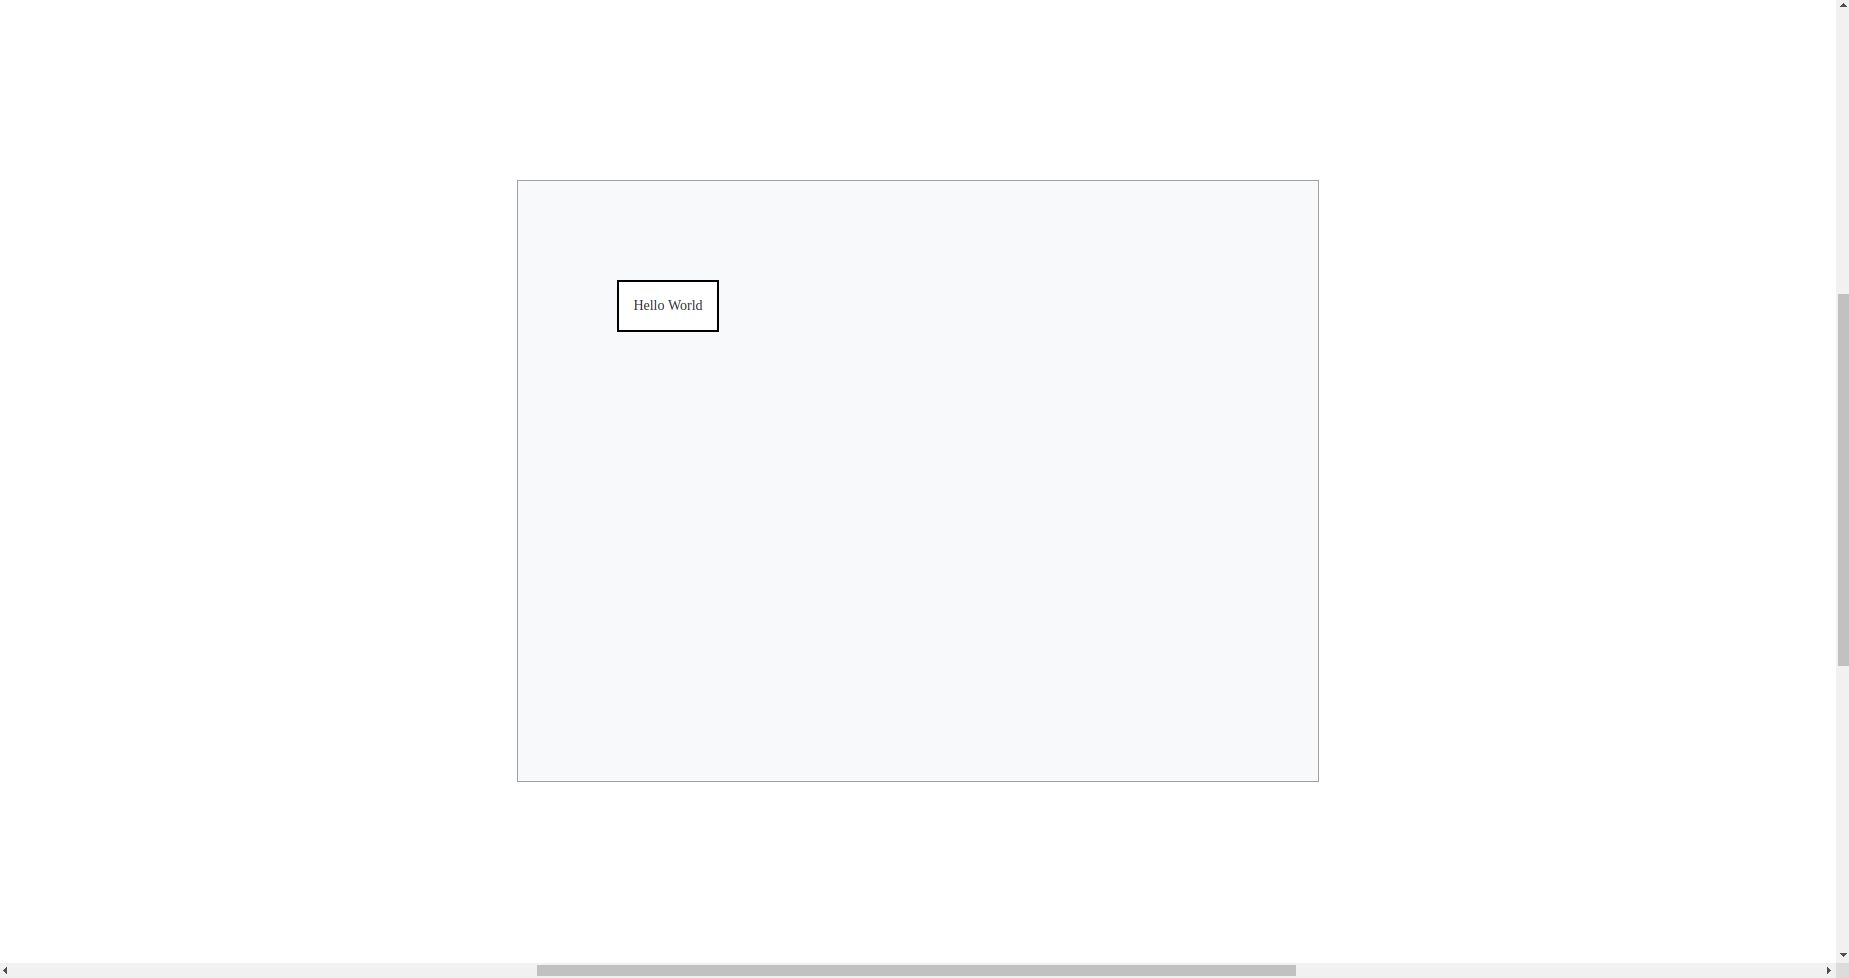
const rect = new shapes.standard.Rectangle({
    position: { x: 100, y: 100 },
    size: { width: 100, height: 50 },
    attrs: {
        label: {
           text: 'Hello World'
        }
    }
});

graph.addCell(rect);
paper.unfreeze();

return () => {
    scroller.remove();
    paper.remove();
};
Everything is ready! The final code in "App.tsx" should look like the following:
import React, { useEffect, useRef } from 'react';
import { dia, shapes, ui } from '@joint/plus';
import './App.scss'; // import './App.css'; - if using native CSS

function App() {
    const canvas: any = useRef(null);

    useEffect(() => {
        const graph = new dia.Graph();
        const paper = new dia.Paper({
            model: graph,
            background: {
                color: '#F8F9FA',
            },
            frozen: true,
            async: true,
            sorting: dia.Paper.sorting.APPROX,
            cellViewNamespace: shapes
        });

        const scroller = new ui.PaperScroller({
            paper,
            autoResizePaper: true,
            cursor: 'grab'
        });

        canvas.current.appendChild(scroller.el);
        scroller.render().center();

        const rect = new shapes.standard.Rectangle({
            position: { x: 100, y: 100 },
            size: { width: 100, height: 50 },
            attrs: {
                label: {
                    text: 'Hello World'
                }
            }
        });

        graph.addCell(rect);
        paper.unfreeze();

        return () => {
            scroller.remove();
            paper.remove();
        };

  }, []);

  return (<div className="canvas" ref={canvas}/>);
}

export default App;
Now run npm start to host your application.
Your demo app should look like this: